Welding is one of the most critical fabrication processes in manufacturing and construction. It joins two pieces of metal together by heating them to a welding temperature, after which filler material is added to create a weld bead.
The technique is used on various materials, including steel, aluminum, and stainless steel. While there are many types of welding, wire feed welding is one of the most popular.
With this guide, you will learn everything about wire feed welding, from setting up your machine to creating a weld bead that is strong and looks good. We’ll also touch on the safety equipment you need to use.
How To Wire Feed Weld
The basic steps to wire feed welding are:
- Ensure the welders are correctly set up and ready to go.
- Feed the wire through the welder and into the electrode holder.
- Next, please turn on the machine and adjust it to weld.
- Push the trigger to start welding, allowing a small amount of wire to feed through the machine.
- Continually move the wire down the seam until it’s complete.
- You need to adjust the machine to be ready to weld again.
- Repeat steps 4 and 5 until you have completed the desired amount of welding.
- Now turn off the welder and allow it to cool down before storing or moving it.
What Is Wire Feed Weld?
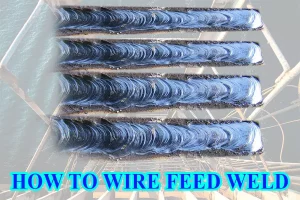
Wire feed welding uses a continuous solid wire electrode to produce the weld. There is a supply of wire that is continuously fed from a spool, so the electrode is always available, and so you don’t have to stop to reload.
Many different materials can be welded, including steel, aluminum, brass, and copper. In many cases, welding offers a more reliable and more robust joint than other methods of joining metals.
The wire feed welding process is used extensively in manufacturing and construction because it produces high-quality welds quickly and easily.
They are often used for welding aluminum and magnesium because they have a very smooth weld.
The weld pool is usually protected from the atmosphere by a flux coating. Generally, welders add flux to the wire, but you can also apply it to coat the workpiece.
Flux and the shield gas help remove impurities from the weld pool and aid in creating a good weld bead.
Wire feed welding is a popular choice for many reasons.
- It is a relatively straightforward process to learn
- it can be used to weld various materials.
- It also produces a strong weld that is less likely to break than other welding processes.
- It’s faster than other welding methods
- Its also clean and efficient
There are a few different names for wire feed welding, which can be confusing. Some of the most common terms are MIG welding and GMAW welding.
In the end, all of these names refer to the same process – using a wire feed to fuse two pieces of metal.
In GTAW (also known as gas tungsten arc welding), you use an electrode to create the arc, while in the GMAW process, a wire is fed through a gun and focuses the arc’s heat onto the weld joint.
The most common wire feed welding type is straight-wire or stitch-welding. This method is perfect for projects that need a lot of welding in a short amount of time, like creating metal structures for buildings or bridges.
Another popular type of wire feed welding is called pulsed-wire or pulsed-current welding. It’s ideal for projects that require a lot of precision, like making jewelry or artistic metal sculptures.
How To Wire Feed Weld: Step By Step Process
1. Adjust the Settings On the Welding Machine
You start the wire feed welding process by setting the machine to the correct amperage and voltage.
You have to adjust your welder’s settings to provide enough heat to melt the metal and create a strong weld bead, but not so much heat that it melts through the metal or burns through your base material.
Then, you set the wire speed according to the thickness of the metal they’re welding.
2. Prepare Your Metal
Next, you begin by clamping the pieces of metal together, making sure they’re tight and level.
You can use a carbide scribe or a woodworker’s awl to draw a line that will guide you if you are still relatively new to welding.
Next, clean the metal using a degreaser to ensure a solid weld.
3. Start the Machine
Then, you start the machine and hold the wire against the metal you’re going to weld.
As you pull the trigger of the welding gun: the power supply kicks in, and the rollers start rolling; the shield gas begins to flow as the arc comes to life, and the wire is fed through the rollers.
Continually move the wire along the seam until it’s complete. The wire by now has been heated and melted, and a weld junction has formed. You should repeat the process until you have completed your desired amount of welding.
When welding with a wire feed welder, you have to direct the welding wire at the weld joint. If you incorrectly direct the wire, it can cause problems with the weld.
The wire can either ricochet off the metal or stick to the metal and create a weld joint that’s too thick.
What You Need To Consider When Using Wire Feed Weld
To understand how wire-feed welding works, you must comprehend the welding basics.
1. The Direction
The direction you are welding in is critical. Always ensure that the wire is feeding in the correct direction, or you will end up with a weld that is not as strong as it could be.
It would be best to direct the welding wire towards the weld joint, not away from it. If the weld joint is too far away from the welding wire, the weld will be too thin and will likely break.
In addition, the direction you are welding in will affect the size and shape of the weld bead.
2. The Type Of Joint You Are Welding
The angle of the workpiece is one of the most important. If you’re not getting the desired results, it may be because your welder is incorrectly not set up.
The angle at which the weld is made will affect the weld’s penetration and quality. The correct angle will ensure that the weld and the base metal melt adequately.
If you’re not getting good welds, it may be because you’re not setting up your welder correctly.
T-Joint
The T-joint weld is the most common type of weld joint. It is composed of two pieces of metal welded together at a right angle, forming the letter “T.”
This weld joint is used in many applications, such as metal fabrication, construction, and manufacturing.
The T-joint weld is strong and relatively easy to execute. When welding a T-joint, you must consider the type of metal you are welding.
The two pieces of metal must have the same chemical composition and be of the same thickness.
It would help if you kept the welding gun at a 45-degree angle throughout the process.
Butt Joint
A butt joint is the most straightforward type of weld used to join two pieces of metal at a right angle. The two pieces of metal are aligned so that the end of one piece is flush against the other.
You should therefore maintain a 90-degree angle between the gun and the metal. Your travel angles should remain between 5 and 15 degrees and not more than that.
Lap joint
The lap joint is created when two pieces of metal are welded together at a right angle, with the edges of the metal overlapping.
These joints require a working degree angle of between 60 to 70 degrees, but you’ll need to adjust the angle as per the thickness.
The thicker it is, the wider the angle.
3. The Amperage Vs. Wire
In general, the higher the amperage (I), the thicker the wire that you can use. The lower the amperage, the thinner the wire.
Generally, a 0.035-inch or a 0.045-inch wire is best suited for high temperatures. For lower temperatures, it’s ideal to use a 0.023-inch wire.
In some cases, the type of metal you’re welding will also dictate the wire size used. For example, aluminum requires a thinner wire than steel. Remember always to leave about 3/8th inches of wire that will stick out of the machine gun.
4. The Type Of Wires
Welders commonly use two main welding wires with wire feed welders: ER70S-3 and ER70S-6.
ER70S-3 is a mild steel wire that is good for general welding. It produces a good weld bead, has a low spatter, and is easy to use.
ER70S-6 is a stronger wire that is better for welding high-strength steel. It produces a more brittle weld bead and is perfect for rusty steel.
The main difference is that ER70S-3 has a lower carbon content, making it less brittle and more resistant to cracking. ER70S-6 has a higher carbon content, making it more brittle and a higher melting point.
5. The Position
Another important factor to consider is the working angle of the weld joint when welding.
Vertical
When welding in the vertical position, the weld bead will be taller and narrower than in the horizontal position.
In the horizontal position, the weld bead will be broader and flatter than when welding in the vertical position.
Horizontal
In a horizontal position, you have to remember that you’re working with gravity, and therefore you’ll have to adjust between 0 and 15 degrees as much as possible. Vertical positions will require between 5 and 15 degrees from a perpendicular position.
Overhead
Overhead positions are another thing altogether; you’ll have to use all the tricks and tips in the book as there are. To ensure the weld puddle is small, reduce the amperage and work swiftly.
To keep the weld puddle from overflowing away from the weld, always use a circular motion and whip movement.
6. Gas Selection
When welding with a wire feed, the type of gas you use can significantly impact the quality of your weld.
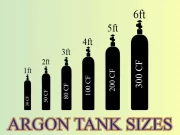
Shielding gas is one of the most critical factors in welding, as it protects the weld from contaminants and helps produce a quality weld. There are three main types of shielding gas: Argon, helium, and carbon dioxide.
Each one has its own unique set of benefits and drawbacks. Sometimes a combination of the different gases works best.
- For aluminum, use 100% Argon.
- Use 90 percent argon, 7.5 percent helium, and 2.5 percent CO2 for stainless steel.
- 100% CO2 is very economical and penetrates more profound than any other gas. The only disadvantage is that it produces a lot of spatter.
- For carbon steels, use ¾ Argon and ¼ CO2; it’s an all-purpose shield.
- For thicker sections of your metal, consider using 90% argon and 10% CO2
- When you’re working with rusty metals, use 85% argon and 15% CO2
Safety Tips
Welding safety is a critical part of the welding process. And, when you are using wire feed weld, there are some additional safety concerns that you need to consider.
Proper welding safety equipment is the most important safety consideration when using wire feed weld; this includes;
- flame-resistant clothing and overalls
- leather gauntlets gloves
- welding helmet (should be air fed)
- boots
Furthermore, ensure you have a fire extinguisher on hand if there’s a fire emergency.
Conclusion
Welding can be an instrumental skill to have, and in this guide, we’ve shown you how to wire feed weld like a pro. Always remember to have safety equipment on you during any welding process.
Hopefully, you have found this guide to wire feed welding helpful. Check out our other welding articles if you’re interested in learning more. Thanks for reading!


